


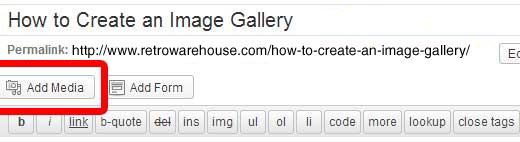
First, create a new article, or alternatively, if you want to add the gallery to an existing article, then open your existing article to edit it. Once you are on the article edit screen open, click on the “Add Media” button.
This will open the Retrowarehouse media uploader. Now click on “Create Gallery” link on the left side of the screen. To add images to the gallery, you can either upload the images from your computer or choose existing images from the Media Library (images that you have previously uploaded). Select the images you want by clicking on them. This will add a check mark on each image (see the screenshot below).

Once you have selected all the images that you want to add in your gallery, click on “Create New Gallery” button. The media uploader will then show your selected images in the Edit Gallery view. Here you can add captions to your images, change your gallery settings, and reorder the images by simply dragging and dropping them in the order in which you want them to appear. When you finish editing your gallery, click on the “Insert Gallery” button.

Clicking on “Insert Gallery” button will close the media uploader and insert the gallery code into your article. If you are using the Visual Editor, you will see a box in the edit area indicating that there is gallery code.

If you are using the HTML editor, you will see your gallery shortcode—something like this:
[gallery ids="5,8,6,7,9,10,11,12"]Check your gallery by clicking on the post “Preview” button. If you are not satisfied with how it looks, then you can always click on Add Media button to edit your gallery’s settings, rearrange order, increase or decrease image columns, add or remove an image or description. Once you are happy with the way it looks, you can publish your article and your gallery will be visible for everyone for read.