


Audio files can be music files or voice recordings, such as recordings of you speaking to your readers. These files add a nice personal touch to your blog. You can easily share audio files in your article by using the “Add Media” feature.
After you insert an audio file in an article, your readers can listen to it on their computers or download it onto an MP3 player and listen to it while driving to work, if they want.
INCLUDING AUDIO FILES
To include an audio file in your article, select one of the following two methodss:
- Audio Files Hosted Elsewhere: Upload an .MP3 M4A, .OGG, or .WAV file somewhere on the internet and link to it using the audio shortcode (if you have found an audio file elsewhere, simply grab its URL). To do this, enter the shortcode, which looks like this:
[audio], with the address inside. For example:[audio http://external-link-to-audio-file/brucespringsteen-interview.mp3]and[audio http://external-link-to-audio-file/brucespringsteen-interview.m4a]will produce the following players:
Download: brucespringsteen-interview.m4a When you are uploading or linking to a file hosted elsewhere, please respect the wishes of that service.
- Audio Files Hosted on Retrowarehouse: Upload an MP3 file to the Retrowarehouse Media Library.
- Click the “Add Media” button on the “Edit Post” or “Add New Post” page.
- The “Insert Media” window appears.
- Click the “Upload Files” tab at the top and then click the “Select Files” button.
- Select the audio file you want to upload and then click “Open” –OR– drag the file from your computer and drop it into the upload screen or click “Select Files.” The audio is uploaded from your computer to the Retrowarehouse server, then the “Insert Media” window displays your uploaded audio selected and ready for editing.
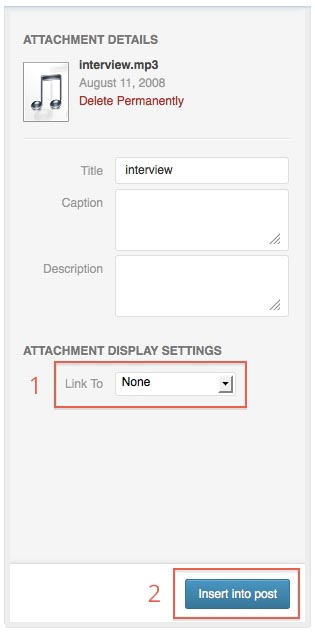
- In the “Attachment Details” section, type a title for the file in the “Title” text box, a caption in the “Caption” text box (optional), and a description in the “Description” text box.
- Make sure to click the “None” button for “Link URL” and then click the “Insert into post” button.
Please note that if your current browser does not support HTML5 audio for your uploaded format, or Flash Player is not installed, a direct download link will be displayed instead of the player.
PLAYLISTS
You can add several MP3 files to create a playlist. Other file types aren’t supported at this time.
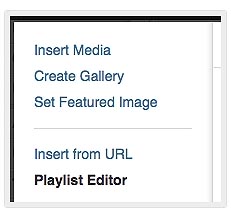
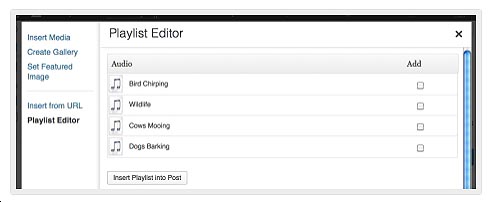
Once your MP3 files are uploaded, a “Playlist Editor” tab will appear in the “Add Media” window.
From here, you can choose which audio files to include, drag and drop the order, and insert into your article.
Customizing the Audio Player
The table below includes all of the current options available to you for customizing the shortcode output.
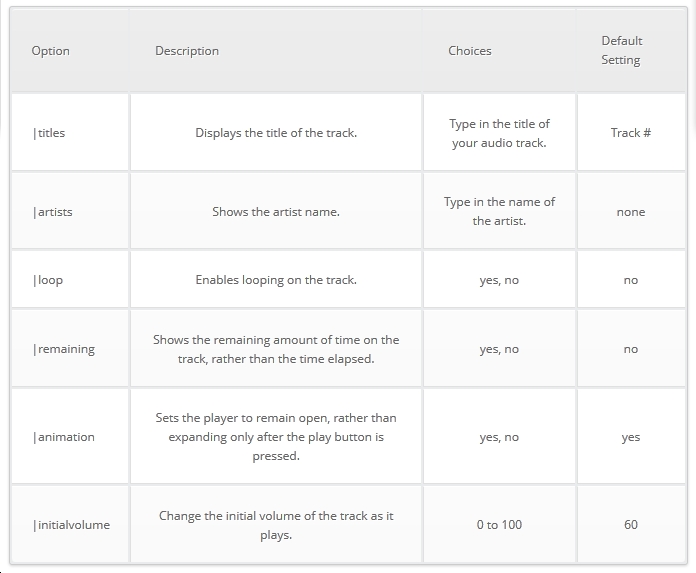
To use these customizations with your Audio Player, insert the option you would like to enable after your audio file URL in the audio shortcode. For example, to display the title in the audio track above, add “|titles=Bruce Springsteen Interview” to the audio shortcode:
[audio http://external-link-to-audio/springsteen-interview.mp3|titles=Bruce Springsteen Interview]This following will display the Audio Player with the title after the play button is clicked:
When using more than one of the customization options, add one option after the other, separated by a |. For example:
[audio http://external-link/springsteen-interview.mp3|titles=Springsteen Interview|loop=yes|animation=no]This shortcode will display the title of the audio track, cause the Audio Player to loop the track, and disable animation, or leave the player open automatically:

Playlist Tips to Remember:
- You can edit the names of your songs in the Media Library.
- You can’t auto-play your music with this playlist.
- The player will play the complete song.